Showing posts with label Dress. Show all posts

Tuesday, August 2, 2016

Altering dress

Between rounds of Sock Madness, I attended a formal weekend event. In preparation, I purchased a formal dress from the Thrift Store - only $11! Unfortunately, while it fit nearly perfectly, the shoulders needed to be taken in, as they often do on my clothes.

Well, a night's work later, they were fixed. I had to rip open the seams of the shoulders, creatively hem the mesh, cut out the satin and re-seam the top of the shoulders, and then hand wip stitch back up around the outside.
It was generally more complicated than I thought it would be, but I was pleased with the result, and I was able to wear it without pins or bulky folds that weekend!

Wednesday, December 16, 2015

Sunshine Dress

This was another beauty that I made back in the summer of 2013 in preparation for a professional life. You see, I was trying to work in layers, and to use only a certain palette of colors, so that everything would go with everything else. That's a huge bonus in Rochester!

Well, I also discovered that with my strange body shape, most "professional" silhouettes looked terrible on me! So, I began making my own, in the colors I wanted, and the styles I wanted.

In fact, if you look back, most of what I make fits this profile.

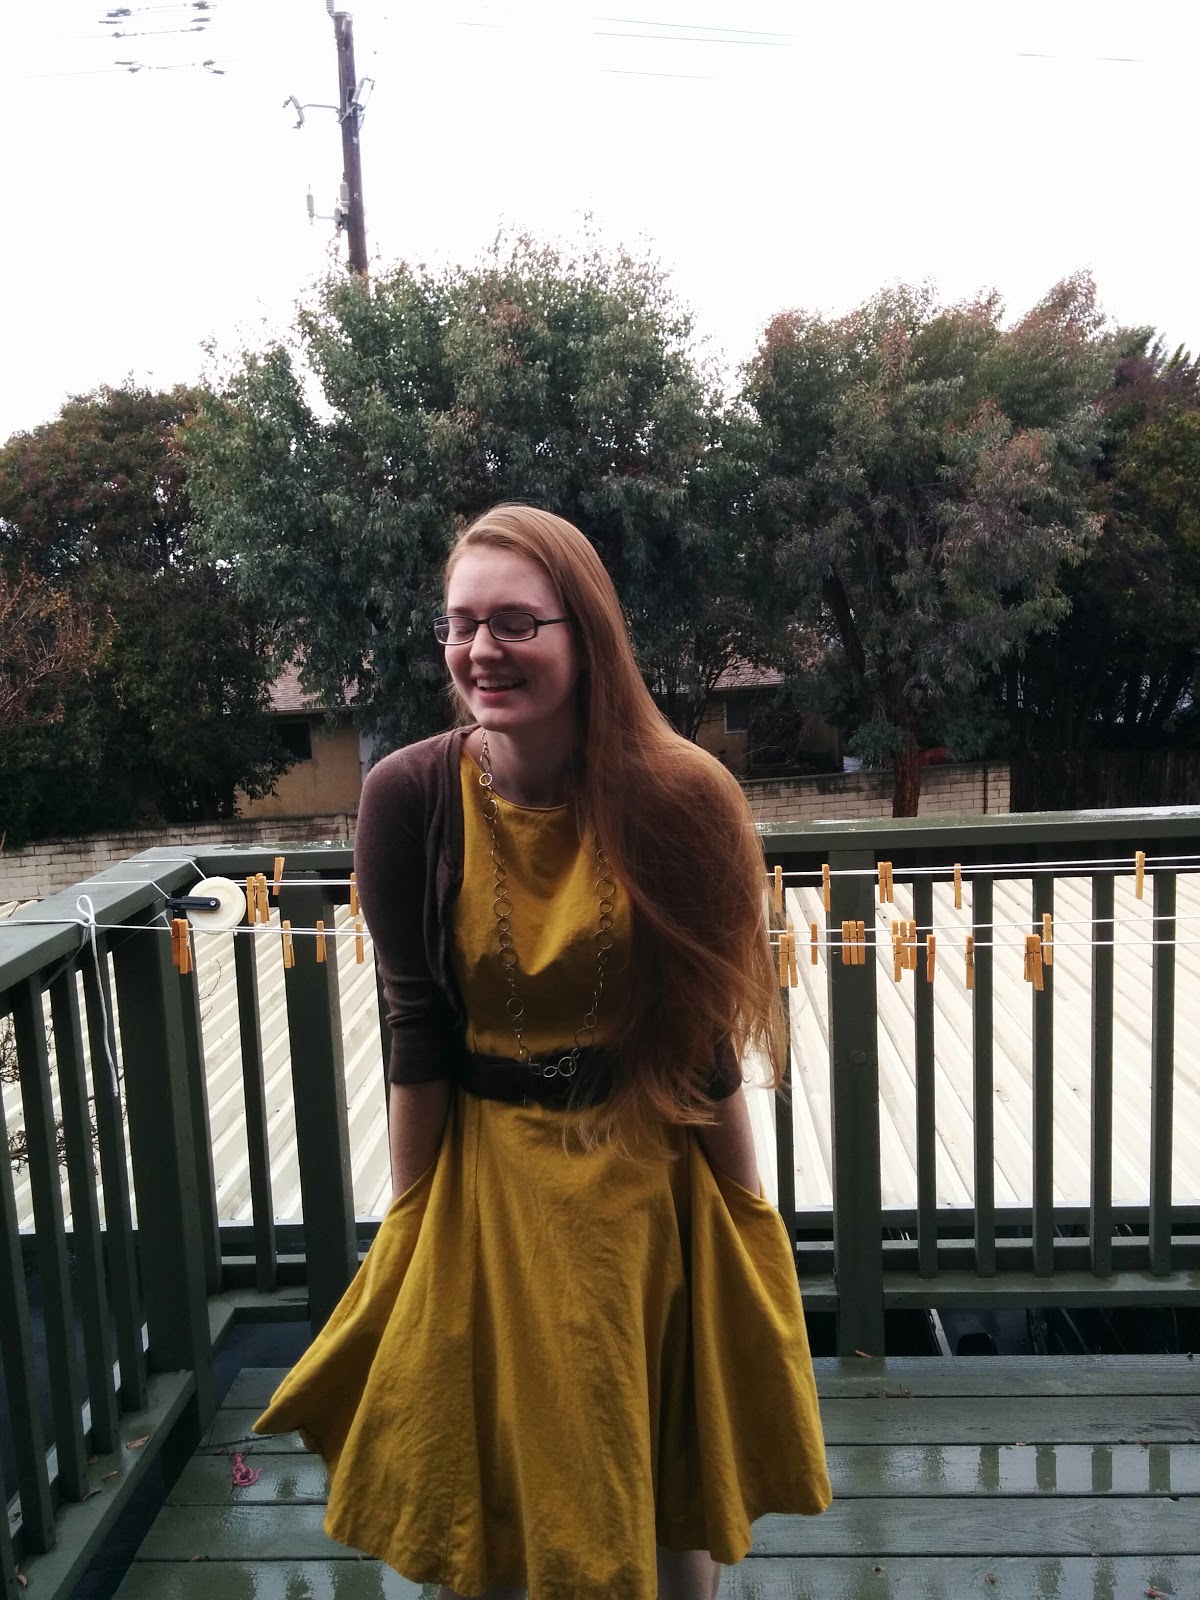
Anyway, on to my sunshine dress! Using another pattern, I was able to make this from broadcloth, a thick one, and I just love the way it hangs!

Oh! And it has pockets!


Wednesday, August 5, 2015

Pillowcase Dresses from the kids!

About a year ago, I did a pillowcase dress tutorial series.

I went to pack the dresses off and send them to their destination, when someone at work mentioned that they would like to have a sewing class for the kids.  As you can guess, these were the results!

(I have taken only one picture of each - they are each double sided like the others, but don't contain pockets.)


Wednesday, June 11, 2014

Pillowcase Dresses - Pocket Tutorial

Last Monday, we discussed how to create the body of a pillowcase dress.  Today, we're going to discuss how to add pockets and finish the dress!

You Will Need:

  • The dress body from the first part of the tutorial
  • scraps of fabric that match each side of the dress
  • Decorative borders/lace/ribbon if desired
  • thread, pins, sewing machine
Directions:
  1. Measure and cut your pocket pieces.
    Each pocket will be about 5x5 inches when completed, so you will need fabric accordingly.  It is easiest to use two scraps about 6x6 or one scrap about 12x6 for this.  They do not need be be perfectly shaped or even neatly trimmed.  These are scraps, after all.
    Step 1: Pocket Pieces
  2. Fold and sew hems.
    If you are using a rectangle (such as in the pictures), then you will need to fold in the ends of the rectangle in order to "hem" the edges of the pockets.  Press these ends flat and sew them down.  I was using pieces of fabric from an old sheet, so one edge was already hemmed, and I did not press or sew that edge.
    If you are using two squares, simply fold down one edge of each square.
    If you want to add a decorative edge, then hold that ribbon or lace against the front of the pocket while you hem one edge.  Here's an example of rick-rack being added to this seam.
    Step 2: Folded hems
  3. Fold and sew pockets.
    If you are using a rectangle, fold your pocket in half the long way, with the right sides together, and Sew across the two open edges without hems.
    If you are using two squares, place them right sides together with the hems on the same edge, and sew across the other three edges.  Cut and tie off ends near the bottom of the pocket.  The ends near the top should be tied and tucked into the selvage.
    Turn your pocket right-side out and press flat.  You now have a stand alone pocket.
    Step 3: Sewing Pocket Sides
    Step 3: Tucking in Ends
    Step 3: Stand Alone Pockets
  4. Pin the pocket to the dress.
    For this step, you will want to pull the two sides of the dress apart from one another.  Isolate one "pillowcase tube" and lay it flat, with the seams on the edges.  You are now facing the front of the dress.  Decide where you want to place your pocket and, using two pins, pin the top, open seam only on the back, so that the front hangs open like a normal pocket. (My husband decided to jump in the picture for you all xD)
    Step 4: Dress parts separated and flattened
  5. Sew the pocket to the dress.
    Place the pocket and dress in your sewing machine.  You will want to have your foot lying between the two sides of the pocket on the hemmed/top edge, with the needle lined up with the far seam. (See picture).
    Sew across to the other seam, securing the back/top of the pocket to the dress.
    Then, lift your presser foot and turn the fabric so that you are now going down the edge of the pocket.  Flatten the pocket out and make sure that it is well placed, and then sew down the edge.
    When you reach the next corner, lift and pivot again.  Before you sew the last two sides, it is a good idea to pin them down to keep the pocket from being crooked.
    Sew back up to the starting point on the pocket.  Pull all your threads to the back of the dress, tie, and snip them.
    During these steps, you can use any stitch you want, really.  I have used decorative stitches before, but this time I was running low on thread.
    Repeat for the second pocket.
    Check for loose threads and tie them off.  You now have a beautiful new pocketed, double sided pillowcase dress!
    Step 5: Begin Sewing across the top back with the needle lined up to the first seam
    Step 5: Sew across, then lift presser foot and turn (you can see the inside seam here).
    Step 5: Sew around edges.
    Step 5: Bring ends to the back, tie and snip.
    This dress is a little longer than the others because I used scraps instead of pillowcases so that I could make a bigger dress for a bigger girl.  Hopefully these dresses are met with love!
     

Monday, June 9, 2014

Pillowcase Dresses - Body Tutorial

Over the past few weeks, I've posted about five different pillowcase dresses I've made.

Today, I'm going to post about a sixth, along with a tutorial.

Things you will need:

  • two coordinating pillowcases OR two large (pillow-case sized) scraps of fabric
  • one package of half inch bias tape, in a color that suits both pillowcase patterns
  • fourteen inches of quarter inch elastic
  • thread, pins, and a sewing machine
Directions:

  1. Make your fabric into tubes.
    If you're using scrap fabric, you must cut your fabric to be about "pillowcase sized" (eyeball it, usually about 2' across by 3.5' down).  Cut two pieces of each type of fabric, then sew up the edges to make two tubes, one in each pattern.  If it's not hemmed already, hem one side to keep it from fraying.
    If you're using pillowcases, cut across the closed end about half an inch in so that the pillowcase is like a tube, with both ends open.
    See picture.
    Step 1: Pink Dress Tube
  2. Cut your armholes.
    Lay your tube down with the cut/un-hemmed near the top.  Cut two armholes into the sides.  These will be curved, with a little more depth than width, and will be about 4 inches tall and two inches wide.  See picture for close up.

    Step 2: Cut Armholes
  3. Pin the tubes together.This step is a little confusing.  You want to put one tube inside of the other, with the right sides facing each other, and pin along the arm and neck cuts in order to sew them together.  This is going to be the main body of your dress.  Sew along the pins, and then turn the body right side out and press.
    In my case, I accidentally sewed the tubes with the wrong sides together, which luckily, with this project, is not tragic.  I simply trimmed my seam edges closely.

    Step 3: Pin the edges
    Step 3: Pin the edges
  4. Pin and sew bias tape along the neck edges.
    Keep in mind that this bias tape will have elastic threaded through it.  You do not want to sew the whole tape up close to the edge of the body so that you can pull the elastic through later, but you do want this seam to be farther into the dress than the previous seam.  I have included pictures for detail.  Do this on both necklines.
    Step 4: Leave room for elastic
    Step 4: Pin and Sew Bias Tape
  5. Thread Elastic through the bias tape and secure edges.
    You will need to cut your elastic into two 7" pieces.  Thread your elastic through the bias tape, being sure to secure both ends so that it doesn't pull through.  Sew over the edges, and then tie and trim all threads.
    Step 5: Thread Elastic
    Step 5: Trim Threads
  6. Prepare Bias Tape Straps.
    Cut the remaining bias tape in half, and then mark the halfway point on each piece (see picture).  Line this half-way mark up with the seams in the edges of your armholes.  If you used tubes without seams on both sides, then fold and pin to find the half-way point.
    Pin the bias tape up and along the armholes as closely as you can to the edge of the fabric.
    Tuck the ends of the bias tape in on themselves in a manner so that they would be hemmed off if the tape was sewn up the edge (see picture).

    Step 6: Cut and mark the remaining bias tape
    Step 6: Pin Bias Tape around armholes
    Step 6: Pin edges to hem/bind off
  7. Sew to Finish.
    Sew along the edge of the bias tape, ensuring to catch both sides as you go.  These will become the straps that will tie to make the shoulders.  Be sure to hem up the ends as you sew them.
Step 7: Sew Straps to dress
You have now completed the body of your dress.  Next time, I'll show you how to add pockets!

Wednesday, June 4, 2014

Pillowcase Dresses - Example 5

This is the fifth post in the Pillowcase Dress series.  Click here to see the first, second, third, and fourth posts.

Again, this dress is much of a repeat from previous dresses.  The blue plaid has the same yellow pocket, but this time, there is no blue accent on it.  This is because of the yellow bias-tape used for the edging.  It pulled together both sides of the dress.  The flowers also have a yellow pocket, again matching the edging, and also playing off the brighter centers of the yellow flowers on that case.


Monday, June 2, 2014

Pillowcase Dresses - Example 4

This is the fourth post in the Pillowcase Dress series.  Click here to see the first, second, and third.

At this point, you will start to see repeats for the pillowcases.  You see, pillowcases often come in sets of two, and so it's easy to buy three or four sets that all have a common color or two, and then mix and match for several differently fashioned dresses.

The first side of this dress is the same as one previously shown, a blue and green striped pillowcase with a darker green pocket.  The other side as the same blue-edged pillowcase, along with a scrap of floral blue and light green for a pocket.  The bias-tape for the top edging is the light blue.

Friday, May 30, 2014

Pillowcase Dresses - Example 3

This is the third post in the Pillowcase Dress series.  Click here to see the first and second posts.

This dress has one side made of a blue-plaid pillowcase.  The pocket, as you can see, is made from yellow scraps (I had a lot of them), with a tad-bit of left-over blue bias tape as an embellishment, matching the top edging.

The other side is made of a green and blue striped pillowcase, with a slightly darker green scrap as the pocket.