About a year ago, I did a pillowcase dress tutorial series.
I went to pack the dresses off and send them to their destination, when someone at work mentioned that they would like to have a sewing class for the kids. As you can guess, these were the results!
(I have taken only one picture of each - they are each double sided like the others, but don't contain pockets.)
Wednesday, August 5, 2015
Wednesday, July 29, 2015
Eleanor Louise - Second Quilt!
Here it is, my completed second quilt for the lovely Ellie, made from this top!

This was quilted in the ditch, and ended up being about 60x60", the same as the first quilt.
I used an off-brand jelly toll for the stars, and purchased an off-white background fabric, a blue backing, and a green binding.
Again, I made the label with an old Jelly Roll scrap.
Pattern: Star Sampler from Pam and Nicky Lintott's "Jelly Roll Sampler Quilts"
PS: Bonus points if you can find the mistake I fixed between the first post and this one.

This was quilted in the ditch, and ended up being about 60x60", the same as the first quilt.
I used an off-brand jelly toll for the stars, and purchased an off-white background fabric, a blue backing, and a green binding.
Again, I made the label with an old Jelly Roll scrap.
Pattern: Star Sampler from Pam and Nicky Lintott's "Jelly Roll Sampler Quilts"
Wednesday, July 22, 2015
Quilt Top #3 - Owen
A few weeks ago, you saw my first completed quilt. Then, you saw a second quilt top, ready to be quilted.Well, you'd be happy to know that I finished the quilting and am currently binding that quilt. It should be up and at-em for you by next week.
In the mean time, I'm moving. The good news: I might end up with a sewing "room." The bad news? I can't find anything.
You'll have to do this week with an update of my third quilt top, for one Owen, the second of that up-and-coming generation.
Here's the beauty! Though it's not 60x60 like the other two, it has nearly the same square inch count, and I think it'll work anyway!
PS: Bonus points if you can find the mistake in the second quilt top! (I fixed it, don't worry).
Wednesday, July 15, 2015
Dress Form, take two!
Previously, on Ladybug Laboratory....

<cue music>
...STITCHES West, 2015...
...Duct Tape Dress Dummy...
And tonight, we bring you...

<cue music>
...STITCHES West, 2015...
...Duct Tape Dress Dummy...
And tonight, we bring you...
The Denim Dress Dummy!
(New and improved! Except not!)
So, in case you haven't figured it out, I tried to use a pattern from Etsy to turn my Duct Tape Dummy into a nice, vaguely presentable dress dummy that I could call a piece of furniture.
I cut up the duct tape and made a muslin from it. It was terrible.
I drafted another. It was too small.
A third was too big.
I went with it anyway and transferred it to denim, and then made the Mister pin it down to size.
I seamed all the pin-lines. I tried it on. It was about an inch too tight, including the seam allowance, and didn't fit around my waist.
Whatever, I said, I've been working on this all week and I just want to finish it. I'll lose some weight or adjust my pinning.
I stuffed it and sewed it and measured my finished product.
The wait is 2.8 inches bigger than mine, and the breast stuffing popped up and to the sides.
I think at this point I might just by an adjustable one.
It does look quite creative though!
Wednesday, July 8, 2015
Quilt Top #2 - Ellie
Two weeks ago, I posted about my first completed quilt for the newest addition to the Mister's family. I also mentioned briefly in my post about the Sampler Hot Pad that I had accumulated two more quilt tops that I hadn't quilted yet.
Here's the funny thing. I was so worried about catching up on all of my posts, since I was still posting Christmas gifts until March. Well, I'm not exactly caught up yet, but I can't post any of my more recent completions, because they're for Christmas this year. Ah, well. I suppose that's the way it will have to be. You'll hear about them in February!
In the mean time, I shall enlighten you on the second quilt top I made.
After making the quilt for Caleb, the newest addition, I realized that he's only the fourth kiddo in this new generation, and that if I hurry, I might be able to make three more before any new ones pop out! I began with the oldest, and chose another 60x60 pattern with another Jelly Roll. I had planned to have it done for her fourth birthday, but alas, it was not to be. It's alright, though, because my next goal is to have all four completed for the big family Christmas this year.
Here's a photo of the quilt-top, freshly basted to the backing. I chose a nice bright blue for the back to pull out the blue-tones in the front colors and to keep it from being overly girly. Hopefully she likes it. She's the only one who's really old enough to have an opinion!
I'm not sure yet if I'll be able to make a Jelly-Roll binding for this one as well, but if I can, I certainly will.
In the mean time, enjoy the pretty colors!
Here's the funny thing. I was so worried about catching up on all of my posts, since I was still posting Christmas gifts until March. Well, I'm not exactly caught up yet, but I can't post any of my more recent completions, because they're for Christmas this year. Ah, well. I suppose that's the way it will have to be. You'll hear about them in February!In the mean time, I shall enlighten you on the second quilt top I made.
After making the quilt for Caleb, the newest addition, I realized that he's only the fourth kiddo in this new generation, and that if I hurry, I might be able to make three more before any new ones pop out! I began with the oldest, and chose another 60x60 pattern with another Jelly Roll. I had planned to have it done for her fourth birthday, but alas, it was not to be. It's alright, though, because my next goal is to have all four completed for the big family Christmas this year.
Here's a photo of the quilt-top, freshly basted to the backing. I chose a nice bright blue for the back to pull out the blue-tones in the front colors and to keep it from being overly girly. Hopefully she likes it. She's the only one who's really old enough to have an opinion!
I'm not sure yet if I'll be able to make a Jelly-Roll binding for this one as well, but if I can, I certainly will.
In the mean time, enjoy the pretty colors!
Wednesday, July 1, 2015
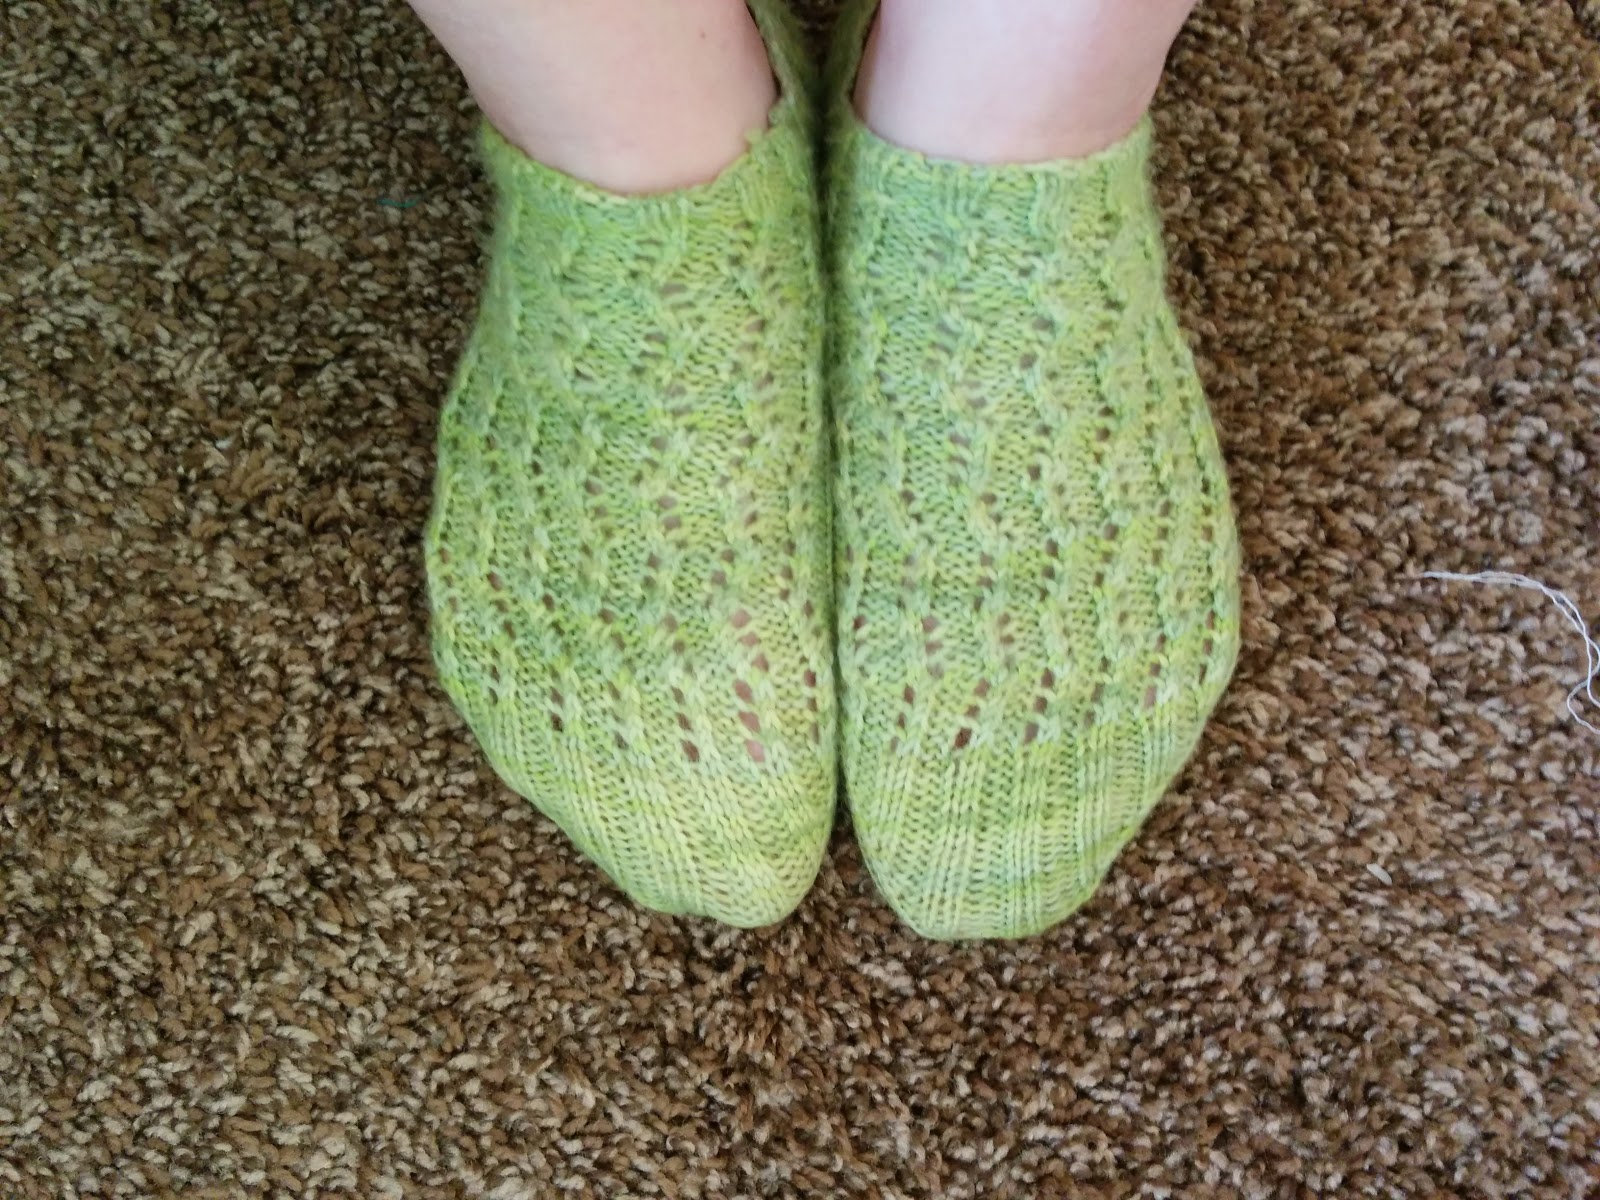
Harpa Socks
As part of my Cold Sheep Commitment, I decided to make another pair of socks from the Springtime Tonal Stroll KnitPicks I had purchased almost a year ago. Previously, I had made the Field to Forrest Socks from that yarn, and I knew it stood well to my feet.I chose a pattern from Ravelry called "Harpa Socks," and though I liked the pattern, I still detest heel-flap heels, largely because they don't fit well on me, so I remain a little bitter about that.
Really, I should have just done the heel I wanted. Oh well.
Here they are. Hope they work!
Sadly, I also lost one of my Field to Forrest socks! I hope it turns up eventually, but I do have enough yarn to make another if need be...
Ravelry Project
Wednesday, June 24, 2015
Caleb Liam - First Completed Quilt!
It's been over a year. If you've been following this blog at all, you've probably been wondering what happened to The Quilt I made for the new baby. Well, here it is.
Quilting had been seriously difficult. Seriously. I tried to machine quilt in stipple, and ripped it all out. I tried long arm quilting at the local store, and never really got a chance to try, and finally gave up. Then, after another few months, I finally decided to give in-the-ditch a try on a sampler hot-pad from stash fabrics. I gave in a cheater binding, took a deep breath, and began on the quilt.Over a month later, I finally had the result. I quilted on my home machine in-the-ditch for most of it, and then made a quick triangle-like pattern for the linking blocks that I repeated in the border.
The quilting ended up being a little bunchy on the edges, but a friend let me use her basting spray for the borders, which I understand is cheating, but it made such a huge difference and I absolutely mean to use it next time! Besides, it was my first quilt, and instead of ripping it out for the third time, I decided to let it go!
I wasn't sure what to do about the label for a long time, since there are 3 other kids in this generation that I'm making quilts for, in order to catch up for all the new babies, and I wanted to include true birth dates, but also dates of completion. I eventually decided on the design you can see below, which had the added benefit of fitting on scraps of Jelly-Roll strips.
I also used Jelly-Roll Scraps to make a scrappy binding, and I love that!
Anyway, let me know what you think! And I can't wait to give this to the little one!
Wednesday, June 17, 2015
Baby Slippers (& Headband)
Last week, I posted about the slippers I made for my lovely roommate when we first moved in. Well, it's been almost two years since then, and right about now that lovely lady will be giving birth to her first baby, a little girl, and I can't wait to welcome her into the world.Right now, Cindy lives quite far away, so I wanted to present her with something that would ship well, but also show love. And then it hit me.

Of course. Slippers!
After much deliberation, I decided on a baby-slipper crochet pattern that was vaguely similar to the one I had made for Momma two years before, and whipped it up so I could get it out in the mail.
But they were so tiny. And small. It needed something more.
After some more searching, I found a headband pattern that matched (enough). After swapping out the flowers so they all matched, I packaged them up to ship off to the lovely new gal!
I hope she likes them! And I hope they fit! Everything always seems smaller than it should be when I make baby sizes...Ravelry Project: Booties
Ravelry Project: Headband
Wednesday, June 10, 2015
Soft Slippers
Almost two year ago, now, when I moved in to my apartment in the heart of the Inner-City for the last bit of my formal education, my roommate and I began a great relationship. We had known each other casually before moving in, and had a mutual friend who was to take the third bedroom, but she bailed, and we began a semester where we had far too much space, far too many police calls, and outrageous heat bills, and lots of fun.
That first week, when we were settling in and waiting for the real work to start, I was (as I am now) trying to use up my yarn stash. I had recently completed all of my bridesmaids shawls, wasn't sure yet what to make for everyone else, and saw a cute slipper pattern on ravelry, so I whipped up a pair for Cindy.
Originally, I had intended to make one for myself as well, but life soon got in the way, and I worked furiously on other projects for the wedding, and never quite got back around to it.
The other day, I asked Cindy to snap me a few pictures of the slippers, which she gladly did, and I decided to post about them. Don't worry, you'll understand the sudden relevance next week!
Ravelry Project
That first week, when we were settling in and waiting for the real work to start, I was (as I am now) trying to use up my yarn stash. I had recently completed all of my bridesmaids shawls, wasn't sure yet what to make for everyone else, and saw a cute slipper pattern on ravelry, so I whipped up a pair for Cindy.
The other day, I asked Cindy to snap me a few pictures of the slippers, which she gladly did, and I decided to post about them. Don't worry, you'll understand the sudden relevance next week!
Ravelry Project
Wednesday, June 3, 2015
Linen Skirt
![]() |
| Unfinished Skirt at Stitches |
I started this skirt back in October, after I got some yarn from Nicole in exchange for dog-sitting. Following the Carnaby Skirt pattern, which is gorgeous, and I had been looking for an excuse to make a similar skirt, and here was this lovely yarn!
I added 4 stitches to the skirt to increase the length by one box-stitch repeat, and did 17 repeats of the pleats, but when I blocked it, it ended up being 6-8 inches too long around the waist.
I tried to fix this by only attaching one button, hoping that it would curve out and work well. It didn't, but I wore it to the second day of Stitches WEST anyway, because I could, but never wore it again.
Until recently!
With the advice I got from my SnB-ers at Stitches, I decided to add some extra single-crochet rounds to the top to make it fit better. The pattern had already called for two, so on going back, I started with the third, in which I did a single-crochet-2-together stitch in the center of each pleat.
I followed this with another single-crochet only band. Then, on the next row, I did a single-crochet-2-together at each end, and also did a chain-1 and skipped a stitch to make an extra button-hole. Ending on another single-crochet only band, I added the buttons, and I absolutely love the result. Fits beautifully!
Ravelry Project
Subscribe to:
Posts (Atom)