Showing posts with label Patterns. Show all posts

Thursday, June 2, 2016

Striped Double Crochet Ball - Pattern

Once again, I present to you the pattern for the hacky-sacks I previously posted.

Materials:

  • Yarn in chosen colors (worsted)
  • size F crochet hook
  • scissors, darning needle, filling (stockings, stuffing or rice)
Directions (Detailed):
  • Round 1: With color A, create a magic loop. Into the magic loop, chain one, and then make 6 single-crochets. Slip-stitch to the top of the first SC. (6 stitches)
  • Round 2: Make a standing DC, and in the same stitch, make two more DC. Make 3 DC in each stitch around, and slip-stitch to the top of the standing DC. Cut and bind off color A. (18 stitches)
  • Round 3: With color B, attach to first stitch with a chain, and sc in the same stitch, and then sc in the next stitch. (sc twice in one stitch, sc in next two stitches) around, and then sc twice in the last stitch, and slip-stitch to the first sc. (24 stitches)
  • Round 4: Make a standing DC in the first stitch, and then two DCs in the next stitch. (DC in one stitch, make two DCs in the next) around, and slip-stitch to the standing DC. Cut and bind off color B. (36 stitches)
  • Round 5: With color C, attach to first stitch with a chain, and sc in the same stitch, and then sc in the next four stitches. (sc twice in one stitch, sc in next five stitches) around, and then sc twice in the last stitch, and slip-stitch to the first sc. (42 stitches)
  • Round 6: Make a standing DC in the first stitch, and then DC in the next five stitches. (DC twice in the next stitch, DC in the next six stitches) around, and then DC twice in the last stitch, and slip-stitch to the standing DC. Cut and bind off color C. (48 stitches)
  • Round 7: Attach color A, sc around
  • Round 8: dc around
  • Round 9: sc around, cut and bind off color A
  • Round 10: With color C, make a standing DC, and DC in the next 5 stitches. (DC 2 together, DC 6) around, Dc last two stitches together, and slip stitch to standing DC. (42 stitches)
  • Round 11: Chain one, sc in same stitch and next four stitches. (sc 2 together, sc in the next five stitches) around, sc the last two stitches together, slip-stitch to first stitch. Cut and bind off color C. (36 stitches)
  • Round 12: With color B, make a standing DC. (DC 2 together, DC 1) around, Dc last two stitches together, and slip stitch to standing DC. (24 stitches)
  • Round 13: Chain one, sc in same stitch and next stitch. (sc 2 together, sc in the next two stitches) around, sc the last two stitches together, slip-stitch to first stitch. Cut and bind off color B. (18 stitches)
  • Note: At this point, you should stuff the inside of the ball in whichever way you choose, before attaching the last color.
  • Round 14: With color A, Make a standing DC 3 together, and DC 3 together around. Slip stitch to the first stitch. (6 stitches)
  • Round 15: Chain one, sc in each stitch, slip stitch to the first stitch, and bind off. (6 stitches)
  • Sew all ends in
Directions (Simplified):
  1. (A) magic loop, 6 SC (6 sts)
  2. (A) DC 3 in each sc (18 sts)
  3. (B) SC 2, SCinc across (24 sts)
  4. (B) DC, DCinc across (36 sts)
  5. (C) SC 5, SCinc across (42 sts)
  6. (C) DC 6, SCinc acorss (48 sts)
  7. (A) SC all
  8. (A) DC All
  9. (A) SC all
  10. (C) DC 6, DC2tog across (42 sts)
  11. (C) SC 5, SC2tog across (36sts)
  12. (B) DC, DC2tog across (24 sts)
  13. (B) SC 2, SC2tog across (18 sts)
  14. (A) DC3tog across (6 sts)
  15. (A) SC across (6 sts)

Thursday, May 19, 2016

Granny Square Hacky Sack - Pattern


As I mentioned in my previous post, this set of hackysacks was made using a pattern of my own creation, and as promised, here it is.

Materials

  • Yarn, in desired colors. If you choose to follow the schemes above, you'll need 3-4 colors.
  • size F crochet hook
  • scissors, darning needle, and stuffing material (pantyhose and rice or batting)
Directions:

Squares: Make 6
  • Round 1: With color A, create a magic ring. In the magic ring, make one standing DC, and then 2 normal DC. (Chain 1, make 3 DC) three times. Chain 1, and slip-stitch to the top of the standing DC. Cut and bind-off.
  • Round 2: With color B, make one standing DC in any of the ch-1 spaces, and then make 2 more DC in the same space. (Ch-1, make 3 DC) in the same space, then (3 DC, ch-1, 3 DC) in the next ch-1 space three times. Slip-stitch to standing DC, cut and bind-off.
  • Round 3: With color C, make one standing DC in any of the ch-1 spaces, and then make 5 more DC in the same space. (3 DC in the stretch between the sides of DC in the previous round, 6 DC in the next ch-1 space) three times. 3 DC in last stretch, and slip-stitch to standing DC, snip and bind off.
Finishing:
  • Once you have all six sides done, begin binding them together. SC two corners together, and sc across, ending in the next corner stitch. Then, hold another piece up, and stitch in the new set of corner stitches (yes, you will be making two stitches in one of the corners), and follow that side down. Continue in this manner until your ball is all stitched up, except for one side, which is only attached at one side.
  • Fill the bottom of an old pair of stockings with rice, beans, or stuffing, depending on how heavy you want your ball to be. Tie a knot in the stockings, cut above the knot, and stuff it into your ball. 
  • Seam across the rest of your edges, and use a darning needle to weave in all the ends.

If you want to make each side different, you can follow this color schema, making one of each.
  • A, B, C
  • A, C, B
  • B, A, C
  • B, C, A
  • C, A, B
  • C, B, A
If you want to keep the centers the same, and use only three colors, follow this color schema:
  • make 2: A, B, C
  • make 4: A, C, B
You can, of course, use any color schema you would like!

Wednesday, November 18, 2015

Camera Bag 2 - Soft Shell Case

9x12 fabric
As previously seen, I've been working on some camera bags for the photography class at my school. This next post gives you the instructions for the soft camera bags.

24x5 fabric
You Will Need:

  • a piece of fabric (either 9x12 or 24x5, approximately. There is room for adjustments.)
  • quilt batting scraps
  • spray basting (optional)
  • velcro dots
  • Step 2
    Step 1
  • needle and thread


Directions: 9x12
  • Iron out your piece of fabric and lay your quilt batting on top. Spray baste if desired.
  • Fold your fabric in half and quilt across. Your new, quilted piece should measure 9x6.
  • Fold this piece in half again and sew down the open side and bottom with 1/2" seam allowance. Leave the top (pre-folded section) open. This will measure 4.5x6.
  • Tie off the ends and trim. Turn this case right-side out. You should have a case that measures 4x5.5.
  • Add a velcro dot to the opening and use as desired!


Directions: 24x5
  • Iron out your piece of fabric and lay your quilt batting on top. Spray baste if desired.
  • Fold your fabric in half and quilt across. Your new, quilted piece should measure 12x5.
  • Fold over the bottom of the open skinny end by about 1/2" and sew. Your new piece should measure 11.5x5.
  • Fold this piece in half again and sew down the long sides with 1/2" seam allowance. Leave the top (pre-folded section) open. This will measure 5.25x5.
  • Tie off the ends and trim. Turn this case right-side out. You should have a case that measures 5.25x4.
  • Add a velcro dot to the opening and use as desired!


     As you can see, there's plenty of room for adjustments. Play with it and see what works for you and your camera!

Wednesday, November 11, 2015

Camera Bag 1 - Hard Shell Case

As I mentioned last week, there was a need for some camera bags at the school I work at, and I volunteered to make a few. This is the pattern for the blue bag, with hard foam core as filling.

This pattern leaves a space approximately 4 inches by 2 inches by .5 inches for the camera to sit in, so adjust accordingly if you choose to make one for a larger camera.

You will need:
  • 1/2" foam core
    • (2) 3x5 pieces
    • (2) 3x1 pieces
    • (2) 4x1 pieces
  • Fabric scraps
  • Needle and Thread
  • Velcro dots
Directions:
  • Cut two pieces of fabric 9" by 5.5" for the outer shell.
    • Then, cut two small squares out of the lower two corners, each approximately 1" by 1".  Your fabric will look approximately like this, a picture I got from a Fiskars Beach Bag Pattern.
  • Cut two pieces of fabric 7" by 4.5" for the liner.
    • Then, cut two small squares out of the lower two corners, each approximately .5" by .5". All four pieces will look alike, just of different sizes.
  • Place each set with the right sides together and sew down the sides and bottom of each set with a half-inch seam allowance, as seen in the picture above. Iron the seams open.
  • In each bottom corner, seam the edges together to finish the box, again with a half-inch seam allowance. I mention how to do this is my Carry-On Bag Liner Tutorial.
  • Take an extra piece of fabric, at least 5" wide, and longer, and fold it in half the long way, so that there's a 5" fold. Sew down each side. Turn it right-side out, press open, and sew the open end to one side of the bigger section, with a 1/4inch seam allowance, so that when it's folder over, the "lid" will pop out.
  • Iron the open tops of both sections over toward the inside. Only iron in about a quarter-inch over.
  • Turn the bigger set right-side out and fill it with the foam core. The biggest pieces go on the sides, and then line each end with a 3x1 piece. Put a 4x1 piece on the bottom of the set, leaving one 4x1 piece out.
  • Place the liner inside the foam core and pin the two seams along the side and one pin in the middle of each side. With a needle and thread, hand sew across the top of the pressed sides. In each corner, sew over more fabric of the outside section in order to make sure they line up. See picture to the right.
  • Atatch Velcro dots to lid and body, and place camera inside. You will need to place the last piece of foam across the top to keep it steady.

Wednesday, November 4, 2015

Kiddo Camera Bags

At the school I currently work at, the art-department recently added a photography class, and got a series of discount digital cameras for the kids to use. However, since the cameras travel from class to class in a cement school, the wonderful art teacher was looking for some camera bag donations. I volunteered to make a few with what scraps I had, and present two design options to her, both of which will have pattern write-ups in a few weeks.

In the mean time, here are the two results. One is made with a hard foam core, while the other has a double layer of quilt batting.


Wednesday, September 9, 2015

Fall Hand Warmers!

Firstly, let me say that I'm sorry this is coming to you late.  Things have been a little crazy recently, what with it being the start of a new school year, working at a new school, and all that comes with the first year of teaching.

I've also been having a little problem coming up with things to post since the vast majority of the projects I'm completing are Christmas gifts - I'm running out of non-surprise completions!

So on that note, I'd like to ask - if I know you in real life, could you please comment below?  I'd like to know which sub-sets of gifts I can post!  My fingers aren't quite fast enough to make extra things right about now (though I do wish they were!).

With all of that said and done, I decided to give myself a grace week, so I will not be attempting to post a late entry from last week - I will just skip it and move on.  It feels good.

And on to the main event...

As some of you may know, particularly if you've seen me over the summer, I have been knitting away at a set of wrist warmers modeled after the changing colors of fall leaves.  These were a test knit project for my amazing friend Lea over at Leafcutter Designs, who recently published a book called Knit the Sky.  The book is filled with creative designs and patterns that show knitting in a whole new light, and once my Cold Sheep stash is mostly busted, I'm hoping to jump on several more of her delightful ideas!

In any event, these handwarmers were knit with her yarn choice, the same are you would receive in the kit if you were to purchase it from her, and they are perfect for their purpose!

As you can tell, I haven't blocked them yet, but right now they are touring the country with Lea and her book!  I encourage you to take a look at it, and I'm not getting paid to say that!  I really enjoyed reading it, and the perspective it gave me has really encouraged me to keep being passionate about my craft - it doesn't always have to be about getting through enough yards of yarn a day to make it to Christmastime!  And so, because of that new realization, and because everything has been so hectic at work for the past few months, I'm choosing to take a month off of this blog.  I want to focus on enjoying my knitting for a while.  See you in a month!

Ravelry Project

PS: Stay tuned; I also have another knit-kit from this book, but I'm not sure when exactly I'll get a chance to work on it!


Wednesday, July 15, 2015

Dress Form, take two!

Previously, on Ladybug Laboratory....

<cue music>

...STITCHES West, 2015...

...Duct Tape Dress Dummy...

And tonight, we bring you...

The Denim Dress Dummy!
(New and improved!  Except not!)

So, in case you haven't figured it out, I tried to use a pattern from Etsy to turn my Duct Tape Dummy into a nice, vaguely presentable dress dummy that I could call a piece of furniture.

I cut up the duct tape and made a muslin from it.  It was terrible.

I drafted another.  It was too small.

A third was too big.
I went with it anyway and transferred it to denim, and then made the Mister pin it down to size.

I seamed all the pin-lines.  I tried it on.  It was about an inch too tight, including the seam allowance, and didn't fit around my waist.

Whatever, I said, I've been working on this all week and I just want to finish it.  I'll lose some weight or adjust my pinning.

I stuffed it and sewed it and measured my finished product.

The wait is 2.8 inches bigger than mine, and the breast stuffing popped up and to the sides.

I think at this point I might just by an adjustable one.

It does look quite creative though!

Wednesday, May 6, 2015

Captain Cardie and Booties

I'll get back to the other class I took at stitches at a later date (basically, when I have a finished object to show you).  In the mean time, I do want to catch up on my other projects.

In case you haven't noticed, I've been perpetually two months behind.  This can be a great thing when I spend weeks working on a big project, and in cases like birthdays and Christmas, when I can't post the projects until a later date.  In fact, this whole back up is basically because I made so much for Christmas last year that those gifts were still getting posted at the end of February.  Right now, though, I'm a little frustrated by it.  I might keep the posts at twice a week even after the Sophie's Universe CAL is finished to compensate.
Said Book

Anyway, back to what I was saying.

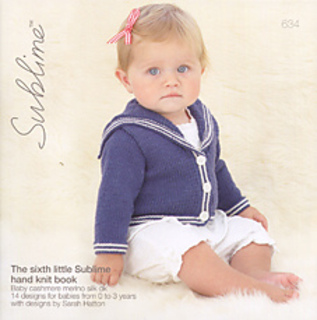
Over Christmas, I got some lovely knitting pattern books from the Mister's parents, and one of them happened to be a baby book.  At first, Randall and I looked at each other, wondering if this was a hint, but we were quickly assured otherwise, and life as usual resumed.

I ended up knitting a couple things from this book when my co-worker went on maternity leave.  Having just returned from STITCHES, where I learned to knit continental (as a result of knitting with one yarn in each hand for my tam), I chose to force myself to knit the whole sweater continental, and the booties as well.

I'm pretty happy with how they turned out, and I now feel reasonably comfortable with continental knitting, which is a plus for sure.

The pattern was extremely confusing and poorly written, though.  I had to have some of the Stitchers help me figure it out.

I also used the Debbie Bliss yarn from STITCHES, so no new yarn purchased!  Win!

Ravelry Project: Sweater
Ravelry Project: Booties

Wednesday, June 11, 2014

Pillowcase Dresses - Pocket Tutorial

Last Monday, we discussed how to create the body of a pillowcase dress.  Today, we're going to discuss how to add pockets and finish the dress!

You Will Need:

  • The dress body from the first part of the tutorial
  • scraps of fabric that match each side of the dress
  • Decorative borders/lace/ribbon if desired
  • thread, pins, sewing machine
Directions:
  1. Measure and cut your pocket pieces.
    Each pocket will be about 5x5 inches when completed, so you will need fabric accordingly.  It is easiest to use two scraps about 6x6 or one scrap about 12x6 for this.  They do not need be be perfectly shaped or even neatly trimmed.  These are scraps, after all.
    Step 1: Pocket Pieces
  2. Fold and sew hems.
    If you are using a rectangle (such as in the pictures), then you will need to fold in the ends of the rectangle in order to "hem" the edges of the pockets.  Press these ends flat and sew them down.  I was using pieces of fabric from an old sheet, so one edge was already hemmed, and I did not press or sew that edge.
    If you are using two squares, simply fold down one edge of each square.
    If you want to add a decorative edge, then hold that ribbon or lace against the front of the pocket while you hem one edge.  Here's an example of rick-rack being added to this seam.
    Step 2: Folded hems
  3. Fold and sew pockets.
    If you are using a rectangle, fold your pocket in half the long way, with the right sides together, and Sew across the two open edges without hems.
    If you are using two squares, place them right sides together with the hems on the same edge, and sew across the other three edges.  Cut and tie off ends near the bottom of the pocket.  The ends near the top should be tied and tucked into the selvage.
    Turn your pocket right-side out and press flat.  You now have a stand alone pocket.
    Step 3: Sewing Pocket Sides
    Step 3: Tucking in Ends
    Step 3: Stand Alone Pockets
  4. Pin the pocket to the dress.
    For this step, you will want to pull the two sides of the dress apart from one another.  Isolate one "pillowcase tube" and lay it flat, with the seams on the edges.  You are now facing the front of the dress.  Decide where you want to place your pocket and, using two pins, pin the top, open seam only on the back, so that the front hangs open like a normal pocket. (My husband decided to jump in the picture for you all xD)
    Step 4: Dress parts separated and flattened
  5. Sew the pocket to the dress.
    Place the pocket and dress in your sewing machine.  You will want to have your foot lying between the two sides of the pocket on the hemmed/top edge, with the needle lined up with the far seam. (See picture).
    Sew across to the other seam, securing the back/top of the pocket to the dress.
    Then, lift your presser foot and turn the fabric so that you are now going down the edge of the pocket.  Flatten the pocket out and make sure that it is well placed, and then sew down the edge.
    When you reach the next corner, lift and pivot again.  Before you sew the last two sides, it is a good idea to pin them down to keep the pocket from being crooked.
    Sew back up to the starting point on the pocket.  Pull all your threads to the back of the dress, tie, and snip them.
    During these steps, you can use any stitch you want, really.  I have used decorative stitches before, but this time I was running low on thread.
    Repeat for the second pocket.
    Check for loose threads and tie them off.  You now have a beautiful new pocketed, double sided pillowcase dress!
    Step 5: Begin Sewing across the top back with the needle lined up to the first seam
    Step 5: Sew across, then lift presser foot and turn (you can see the inside seam here).
    Step 5: Sew around edges.
    Step 5: Bring ends to the back, tie and snip.
    This dress is a little longer than the others because I used scraps instead of pillowcases so that I could make a bigger dress for a bigger girl.  Hopefully these dresses are met with love!
     

Wednesday, May 14, 2014

Zig-Zag Dishcloth (PATTERN)

I previously posted about the second set of dishcloths I made from Aunt Vi's yarn.  Today, I'd like to share the pattern I used for the "zig-zag" dishcloth.

You will need:

  • Scraps of yarn (about 50 yards)
  • Size 6 knitting needles
Directions:
  • Cast on stitches in a multiple of 6 (I used 36)
  • Row 1 (Base Row): (k3, p3) to end
    • (BEGIN LEFT-ANGLED ZIG-ZAG)
  • Row 2: k2, (p3, k3) to last 4 stitches, p3, k1
  • Row 3: p2, (k3, p3) to last 4 stitches, k3, p1
  • Row 4: (p3, k3) to end
  • Row 5: k1, (p3, k3) to last 5 stitches, p3, k2
  • Row 6:  p1, (k3, p3) to last 5 stitches, k3, p2
    • (END LEFT-ANGLED ZIG-ZAG)
  • Row 7 (Base Row): (k3, p3) to end
    • (BEGIN RIGHT-ANGLED ZIG-ZAG)
  • Row 8: p1, (k3, p3) to last 5 stitches, k3, p2
  • Row 9: k1, (p3, k3) to last 5 stitches, p3, k2
  • Row 10: (p3, k3) to end
  • Row 11: p2, (k3, p3) to last 4 stitches, k3, p1
  • Row 12: k2, (p3, k3) to last 4 stitches, p3, k1
    • (END RIGHT-ANGLED ZIG-ZAG)
  • Row 13 (Base Row): (k3, p3) to end
  • Repeat rows 2-13 as necessary.

As you can see in this pattern, you start with a base row (Rows 1, 7, and 13), then angle left for 5 rows, repeat the base row, angle right for 5 rows, and repeat the base row to start over again.

Hopefully this is clear and let me know how it goes!

Monday, May 12, 2014

Lopsided Dishcloth (PATTERN)

Previously, I posted about using Aunt Vi's yarn for dishcloths in two posts.  Here, I'd like to share the pattern I used for my fifth Dishcloth, which I've called the Lopsided Dishcloth.

You will need:

  • Scraps of yarn (about 50 yards)
  • Size 6 needles
Directions:
  • Cast on stitches in a multiple of 3 (I did 39)
  • Row 1: (k2, p1) to the end
  • Row 2: repeat Row 1
  • Row 3: k1, p1, (k2, p1) until there's 1 stitch left, k1
  • Row 4: repeat Row 3
  • Row 5: (p1, k2) to the end
  • Row 6: repeat Row 5
  • Repeat Rows 1-6 until you are satisfied with the length.  Bind off and weave in ends.

Wednesday, April 30, 2014

Gifts of Love: Beaded Earrings (PATTERN)

This post centers on the third pair of earrings I made for a friend I had overlooked. (See the first and second.)  This pair is based on Moira Crochet's Teardrop Earring #5, with a few small additions in order to add the beads to the edges.

I will be posting my additions only here, so please go check out Moira's page for the base pattern!


You will need:

  • Three spools of thread. For my pair of earrings, I used two threads of light blue cotton thread (because that's what I had) and one thread of black polyester thread and crocheted them all as one strand.
  • Two fish hooks, kidney wires, or other earring attachment.
  • 20 Beads
  • Moira's original pattern.

STEP 1: String the beads onto your threads.  This is so important.  You will not be able to get them on once you have started the motif, so put all that you need, or even more, onto your strand at the very beginning.  Remember, since we are using three threads as one strand, you need to put the beads over all three threads.

STEP 2: Follow Moira's instructions here for set up and Rounds One and Two.  The beads don't come in until the very end, so just continue to push them down your strand so that you have room to continue crocheting.

STEP 3: Follow the instructions below in place of Moira's Round Three.

Chained beads, from beadline.blogspot.com
  1. 4 sc into ch-4 space, slip stitch into slip-stitched sc
  2. 2 sc into ch-4 space.  (Then, push your first bead up RIGHT next to the previous sc.  Now, chain one, but make sure that you grab yarn that is beyond the bead.  On the right, I have added a picture of beads crocheted into a chain.  Your bead should look like this.  You have now added a bead.) 2 sc into same ch-4 space.  Slip stitch into slip-stitched sc.
  3. Repeat steps 1 and 2 once more
  4. 5 sc into ch-5 space, slip stitch into slip-stitched sc
  5. 3 sc into ch-5 space, add bead as before, 3 sc into same ch-5 space.  Slip stitch into slip-stitched sc.
  6. Repeat step 5 three times (4 in total)
  7. Repeat step 4
  8. Repeat step 2
  9. Repeat step 1
  10. Repeat step 2
  11. Repeat step 1
  12. Repeat step 2
  13. Repeat step 1 three times
  14. Repeat step 2, fasten off.
Hope you like it!  Let me know how it goes!


Monday, April 28, 2014

Reverse I-Cord Lanyard (PATTERN)

One of the mothers I babysit for absolutely loves lavender.  She also mentioned how desperately she was in need of a lanyard to keep her keys on.  Having a variety of keys for different places on different rings and large bags and coat pockets for them to get lost in, I can totally understand!

So, I took an afternoon to whip this one up for her.  I couldn't find any similar patterns online, so I figured I'd post it here.

Wednesday, April 9, 2014

The Heartwarming Headache: HeadCrab Hat (PATTERN)

My brother-in-law's fantastic post about his hat.

I posted a few months ago about my brother-in-law's birthday gift from last year - cow slippers.  As you can imagine, I had trouble again this year, until my husband sent me this link.  Apparently, headcrab hats are all the rage this year, and he was convinced that Whitsun would love one.

The only problem was that I couldn't find a pattern.

And so, lo and behold,  bring you...the Headcrab Hat Pattern!

Materials:

  • about 150 yards of a bulky, crab colored yarn (subject to change)
  • scrap yarn for your leg-ends
  • size 9 needles
Hat:
(note: this was made to go over dreadlocks)
  • Cast on 66 stitches, join in round
  • Knit in a (k2, p2) rib for one inch
  • Knit stockinette stitch until hat measures 6-7"
  • K2tog every 11 stitches for 9 rows.  12 stitches remain.
  • Cut yarn, thread through, and bind off.
Short Legs:
(make 4)
  • Cast on 5 stitches, join in round
  • Knit for 10 rows
  • Switch to contrasting color, knit 2 rows
  • K2tog twice, knit 1
  • Cut yarn, thread through, and bind off.
Medium Legs:
(make 2)
My hubby in the hat before we sent it out.
  • Cast on 5 stitches, join in round
  • Knit for 15 rows
  • Switch to contrasting color, knit 2 rows
  • K2tog twice, knit 1
  • Cut yarn, thread through, and bind off.
Long Legs:
(make 4)
  • Cast on 10 stitches, join in the round
  • Knit for 15 rows
  • K2tog 5 times
  • Knit 20 roww
  • Switch to contrasting color, knit 2 rows
  • K2tog twice, knit 1
  • Cut yarn, thread through, and bind off.
Finishing:
  • Attach the four short legs across the "forehead" of the hat
  • Attach the two medium legs on either side of the stretch of short legs
  • Attach two long legs on the outside of the front stretch of legs
  • Attach the other two long legs about 4 inches apart in the back
  • Weave in the ends and be consumed!

Friday, March 28, 2014

Travel Blanket: Erie Canal Block (PATTERN)

About a year and a half ago, I realized that I had a problem.  I would stumble across quaint knitting shops, find a beautiful hank of yarn, and buy it, without having any plan for its use.  Needless to say, I quickly built up my stash.

Does anyone else have this problem?

Well, I also like to travel.  A lot.  And so it wasn't long before I came to this conclusion.

Any time I go to a new city or on a trip, I allow myself one hank of yarn.


Randall and I sitting on the roof of the boat.
This hank had to be related somehow to the trip, whether it was through color, texture, material, or a combination.  Then, I would use each hank to make one blanket square, where the pattern somehow related to the trip.  Eventually, I should have enough blocks to make a Travel Blanket!

And then, a few months later, I got engaged!

It was perfect!  I could start the travel blanket with places that Randall and I went together!

That summer, I accompanied him and his family on a self-toured Erie Canal House Boat Cruise aboard the "Cayuga."  It was wonderful!  We stopped at all sorts of places along the way and found tons of farmer's markets and cooked peach pie and played cards!

Working on the color sequence of my project on the boat.
One stop we made was in a quaint Pittsford, NY.  Now, having gone to college in the area, I knew the town, but it was an entirely different world seeing it from the canal at 6 miles and hour!  And in Pittsford, our first stop of the trip, we stumbled across (okay, I looked up) a lovely yarn store called The Yarne Source.

There, I managed to get my mother-in-law of inHIShandsart hooked on knitting.  Now, she carries around a project, too.  Fourteen of the hanks I got were for a separate project to work on that week (more on that later), but I did get one hank for the Travel Blanket.  It's a beautiful sort of canal color, and soft, a silk and cashmere blend.  And now, I have finally finished the square!  I based it off of Terry Morris Design's Rippling Water Square Pattern.

Here is the exact pattern I used:

Cast on 62 Stitches with size 7 needles.

  • Row 1: Purl
  • Row 2: Slip one stitch, (slip 2 to CN, hold in back, k2, k2 from CN, k4) x7, slip 2 to CN, hold in back, k2, k2 from CN, k1
  • Row 3: slip 1, purl
  • Row 4: slip 1, knit
  • Row 5: slip 1, purl
  • Row 6: slip 1, k4, (slip 2 to CN, hold in front, k2, k2 from CN, k4) x7, k1
  • Row 7: slip 1, purl
  • Row 8: slip 1, knit
  • Row 9: slip 1, purl
Repeat Rows 2-9 until the square is the desired length.
For me, this made an 8.5 inch square.  See how it makes a beautiful rippling effect?

What do you think? Has anyone else made something like this?

Wednesday, March 26, 2014

Ben's Socks: Second time's the Charm

Those of you that have been following along know that in January, I made my husband a pair of socks that went around his heels!  Finally!  They still don't fit terribly well, so hopefully next time will be better.  Does anyone have any ideas?  Since his heels are so much wider than the rest of his legs, either they don't fit over his heels or they don't cling to his shins.  I've heard that a double forked heel might work.  Thoughts?

Well, anyway, I used that same pattern to make a pair of socks for my brother's birthday, and since he has a much more typical foot shape, they fit him perfectly.  Behold!

Ravelry Pattern | Ravelry Project

Friday, March 14, 2014

Bartering: A Hat and Mittens for WiFi

Previously, I posted about how I became an unexpected vagrant over the past year.  As part of that adventure, I lived with a good friend in a sparse, ghetto apartment for six months during our final semester of college.

Well, due to the fact that it was only six months, we were unable to get any sort of internet, which we both desperately needed during this semester.

However, we were saved by wonderful, kind neighbors, who generously gave us their wifi password.  We tried to help them with the bills, but they wouldn't hear of it, and only accepted payments in the form of cookies, and only when we initiated.

Well, just a few weeks before we were due to move out (and, for both of us, graduate, move across the country, and for me, get married), one of these lovely neighbors mentioned the fact that I knitted.  Cold as it was, we stood outside and had a quick conversation about it, which ended in a question.

"Would you make my granddaughter a hat and gloves or something?  I know she would love it."

How could I say no?

There was only one problem.  As you've been reading, I was in the process of making five Bridesmaids Shawls, three Flower Girl Cootie Catchers (and fortunes!), four Musician's Baskets, and five Groomsmen's Beerds (description to come).  I was swamped!

So, here I am, after graduating, hosting fourteen people for a week, getting married, moving, dealing with legal bureaucracies, and moving again, finally getting down to this gift!  Hopefully she'll still like it this year!

I decided to go with cables, since I wanted it to have a nice, knitted feel.  I also wanted to use chunky yarn because it's super cold in Rochester, and it's also a much faster knit!  (After a string of socks and beerds, it was a welcome change!)

First, I settled on An Unoriginal Hat for the hat.  It came out well.

Then, I went for the Completely Unoriginal Unoriginal Mittens to go with it.  For these, I decided to just do a loose bind-off after the cabling and skip the ribbing, since it was for a 9-12 year old, after all.

Then, I decided to add a scarf into the mix.  Stay tuned to see the pattern I wrote!

Tuesday, March 11, 2014

Groomsmen BEERDS! (PATTERN)

As I mentioned before, I decided to make Shawls for my Bridesmaids, which led to the creation of Cootie-Catchers for my Flower Girls and Baskets for our Musicians.

The ultimate question was left...

What about the Groomsmen?

Most of them wouldn't appreciate anything that wasn't practical.  They all  had very different interests.  A prank gift would work, but it would have to be different for each person, and then you run into issues of relative-goodness-of-the-prank.

And then, my lovely hubby-to-be came up with a great idea.

L-R: Blonde, Brown, Green (he dyes his hair).
Unpictured: Black
Bearded Beer Holders.

Yes, ladies and gentlemen, that's right, now your beer can have a beard, just like you!  And here I am, to debut the BEERD!

After much searching and no luck, I decided to make my own pattern.

For this pattern, you need:

  • US size 3 DPNs or circulars
  • "hair" yarn, fuzzy, thicker wight, of whatever color you've chosen
  • "skin" yarn, DK or Aran weight, of whatever color you've chosen
  • a bottle
NOTE: The colorwork technique here is, as far as I know, unique, so please pay close attention.*

*Edit: I have since learned that this is basic intarsia knitting, I just made it up as I went along.  Good luck!

Directions:
  • Cast on 40 stitches (SKIN yarn) using whatever method you so choose
  • Join and knit 2 rows in the round
Now we begin with the beard.
  • (row 3) Knit 12 sts (SKIN), then knit 16 sts (HAIR)
Now, here's where things get tricky.  From here on out, you will not be knitting your rows all together.  Take a look at your knitting.  If you were to switch back to the skin color here, and then back to the hair on the next row, etc, imagine all of the stretches of unused yarn you'd have inside your Beerd!  It would be obnoxious and difficult to use.  Instead, here's what you do:

Go back to where your SKIN working yarn tail ends.  Slip stitches around on the needles so that you are ready to begin knitting again right where the colors change.

Slip one SKIN stitch over.  You should have hair stitches on your right hand needle, plus one skin stitch (with has the skin working yarn coming out of it).  On your left hand needle there should be the remaining skin stitches.  You should be holding the stitches with the wrong side facing you.  (See picture).

Then, begin purling the SKIN yarn back.  You will be leaving one skin stitch un-purled.  This is good.
Purl all the way until you line up with the end of your HAIR yarn.

Now, you will notice that in the "non-beard" section, half of it will be on row 4 and half will still be on row 3.  This is because your cast on is in that section.  Don't worry too much about it, but do try and keep track.

Now, what you're going to do is jump up to row 4 with your HAIR yarn, and purl all the way back to the other side of the beard.  This time, you will purl on top of one SKIN stitch when you turn, and then purl on top of the one SKIN stitch we left on the other side.  This will make your beard two stitches wider (one on each side).

Then, knit the SKIN yarn back to the start of the row to finish row 4.

Now, you can knit each section, from where the yarns are left, adding another HAIR stitch for row 5.  You will continue this knit/purl switch-off until your beard is 26 stitches wide.

Once your beard is 26 stitches wide, you're going to alternate on each row.  If we simply kept the beard 26 stitches wide, there would be a giant gap on the sides where it ended.  Instead, we alternate between 26 stitches and 24 stistches, so that the outer-most column of stitches alternates between SKIN and HAIR, keeping the entire Beerd together. (See pictures)

After five rows at 26/24 stitches, we add the mouth.

At this point, you will need one more "end" of each color.  You can either cut the yarn (leaving enough that you can knit much more before running out) or use the other end of your ball.

Wherever you are in your knit-purl switch, on the next row, the middle 6 stitches of the beard should be knit/purled with SKIN from the second end.  On the other side of that chunk of SKIN yarn (ie the mouth), continue knitting/purling with the second end of the HAIR yarn.  Continue alternating in a zig-zag formation at the edges of the beard.

On the next row, add two extra SKIN stitches on each side of the mouth (four total).  Repeat this three times (there should be 18 mouth stitches when you are done).

Hold this formation for two more rows.  Continue to zig-zag at the edge of the beard, but not at the edge of the mouth.
Cut off the SKIN yarn used for the mouth.  Knit/purl across the top of the mouth with HAIR yarn.

For the next three rows, turn one or two HAIR stitches into SKIN on each side of the beard each round, so that the beard gets smaller.  Cut off the HAIR yarn.  Knit across with SKIN.

Knit 10 more rows with SKIN.

Then, repeat the following sequence 5 times:
  • On the next row, decrease 3 stitches evenly across.
  • Knit across
After that, continue decreasing 3 stitches every round until there are 21 stitches left.  Bind off loosely and enjoy!

Ravelry Pattern
Whitsun's Ravelry Project | Luke's Ravelry Project
Rob's Ravelry Project | John's Ravelry Project | Curtis's Ravelry Project
Alec's Ravelry Project | Bret's Ravelry Project

If you liked this post, you might like some of these ideas: